

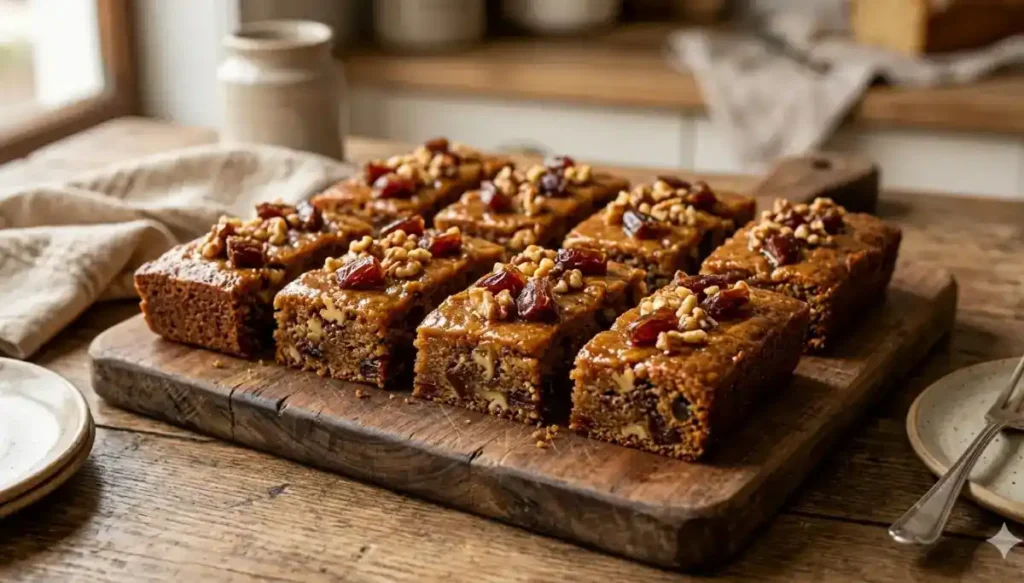
Food for the Gods Easy Baking Recipe: Food for the Gods is one of those rich and premium desserts that I personally enjoy baking whenever I want something special, festive, and satisfying. This dessert is famous for its chewy texture, deep caramel-like sweetness, and crunchy nutty flavor that makes every bite feel luxurious.
Whenever I prepare this recipe at home, it instantly becomes a favorite among my family and friends because of its soft, moist texture and perfectly balanced sweetness. It is one of those desserts that looks simple but tastes like something you would get in a high-end bakery.
Hi, my name is om shinde. I am a chef. I cooked food for my family and relatives. They also like my food. They called me a pro chef. I uploaded videos on social media.
This version of Food for the Gods is designed in a simple and easy baking method so that even beginners can prepare it without any confusion while still achieving bakery-style results at home.
Recipe Overview
- Prep Time: 15 minutes
- Bake Time: 30–35 minutes
- Cooling Time: 20 minutes
- Total Time: 1 hour 10 minutes
- Cuisine: Filipino
- Course: Dessert
- Servings: 12 bars
- Estimated Cost: $6
This recipe delivers a chewy, moist, and flavorful dessert bar that is perfect for both everyday enjoyment and special occasions.
What is Food for the Gods
Food for the Gods is a classic baked dessert that originated in the Philippines and is widely loved for its rich taste and dense texture. It is made primarily with dates, butter, sugar, eggs, and nuts, which together create a soft, chewy, and slightly sticky dessert bar.
I personally find this dessert very unique because it has a natural sweetness coming from dates, which gives it a caramel-like flavor without needing artificial syrups. The addition of nuts adds a light crunch that balances the softness of the base.
This dessert is often cut into small rectangular bars and sometimes wrapped individually, making it perfect for gifting during festivals and celebrations.
Why You’ll Love This Recipe
I love this recipe because it is simple yet gives a premium bakery-style result. It does not require complicated techniques, and the ingredients are easily available.
One of the best things about this recipe is its texture. It is soft, chewy, and slightly dense, which makes it very satisfying to eat.
Another reason I enjoy making this dessert is that it stays fresh for several days, making it perfect for meal prep or storing for later use.
It is also highly customizable, so I can adjust ingredients based on my taste preferences or dietary needs.
Read Also: Best Pepper Belly Pete Chili Recipe Step by Step Guide
Ingredients Table
| Ingredient | Quantity |
|---|---|
| Dates (chopped) | 1 cup |
| Baking soda | 1 teaspoon |
| Hot water | 1 cup |
| Butter (softened) | ½ cup |
| Brown sugar | 1 cup |
| Eggs | 2 |
| All-purpose flour | 1 ½ cups |
| Salt | ½ teaspoon |
| Vanilla extract | 1 teaspoon |
| Walnuts (chopped) | ½ cup |
Equipment Table
| Equipment | Purpose |
|---|---|
| Mixing bowls | Preparing batter |
| Whisk | Mixing ingredients |
| Baking pan | Baking |
| Oven | Cooking |
| Measuring cups | Accurate measurement |
| Spatula | Mixing and spreading |
| Knife | Cutting bars |
How to Make Food for the Gods
Follow the step-by-step instructions below to prepare a perfect batch of this dessert.
Step 1: Prepare Dates Mixture
I start by placing chopped dates into a bowl and pouring hot water over them. Then I add baking soda and let the mixture rest for about 10 minutes. This step softens the dates and enhances their natural sweetness.
Step 2: Cream Butter and Sugar
In another bowl, I mix softened butter and brown sugar until the mixture becomes light and creamy. This step is important because it creates a smooth base for the batter.
Step 3: Add Eggs and Vanilla
I add eggs one at a time while mixing continuously. Then I add vanilla extract to enhance the overall flavor of the dessert.
Step 4: Combine Dry Ingredients
Next, I add flour and salt to the mixture and mix gently until everything is well combined. I make sure not to overmix to maintain a soft texture.
Step 5: Add Dates and Nuts
Now I fold in the prepared dates mixture along with chopped walnuts. This gives the dessert its signature chewy and slightly crunchy texture.
Step 6: Prepare Baking Pan
I grease a baking pan properly and line it with parchment paper to prevent sticking. Then I pour the batter and spread it evenly.
Step 7: Bake
I bake the mixture in a preheated oven at 180°C (350°F) for about 30–35 minutes. The top should turn golden brown, and the edges should slightly pull away from the pan.
Step 8: Cool and Cut
After baking, I let it cool completely before cutting it into neat rectangular bars. This helps maintain the shape and texture.
Pro Baking Tips for Perfect Texture
To achieve the best texture, I always use soft and fresh dates. Dry or hard dates can affect the moisture level of the dessert.
I also make sure not to overbake because it can make the bars dry and hard. Checking the dessert around the 30-minute mark is very important.
Using brown sugar instead of white sugar gives a deeper flavor and better moisture retention.
Common Mistakes to Avoid
One common mistake is overmixing the batter, which can result in a dense and tough texture. I always mix gently after adding flour.
Another mistake is skipping the soaking step for dates, which can affect both texture and flavor.
Baking at too high a temperature can burn the edges while leaving the inside undercooked, so maintaining the correct temperature is important.
Tips and Variations
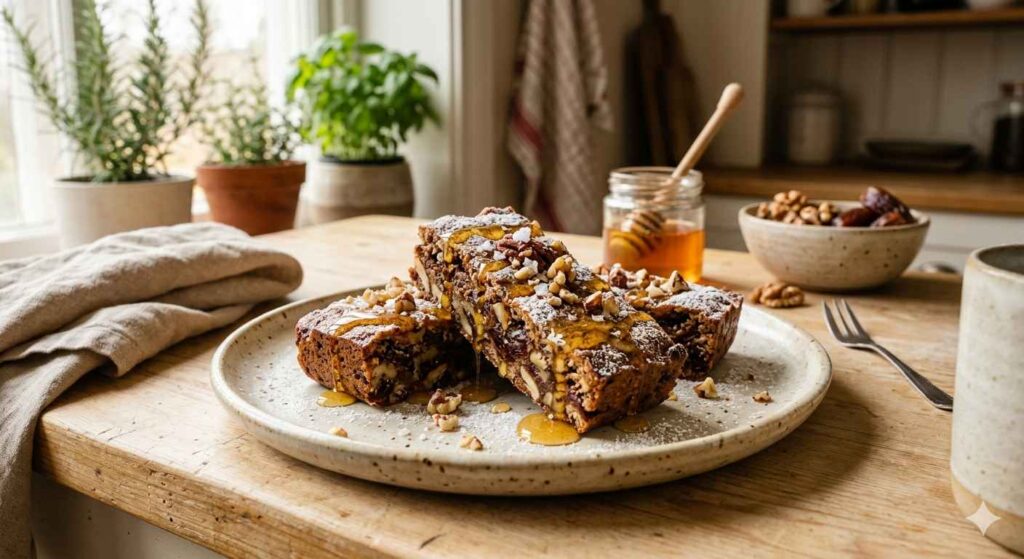
I sometimes add a small amount of honey or caramel syrup for extra richness.
You can replace walnuts with almonds, cashews, or even pecans depending on your preference.
For a healthier version, I reduce sugar slightly and rely more on the natural sweetness of dates.
Adding a pinch of cinnamon or nutmeg can give a warm flavor twist to the recipe.
Storage and Reheating
I store these bars in an airtight container at room temperature for up to 3 days.
For longer storage, I keep them in the refrigerator where they remain fresh for up to a week.
If I want to reheat, I warm them in the microwave for a few seconds to restore their softness.
Nutrition Information
Below is an approximate nutritional breakdown per serving:
- Calories: 180–250 kcal
- Protein: 3–5 g
- Fat: 8–12 g
- Carbohydrates: 25–35 g
- Sugar: 15–22 g
- Fiber: 2–4 g
Serving Suggestions
I usually serve these bars as a tea-time snack or dessert after meals. They pair very well with coffee, tea, or milk.
For special occasions, I like to wrap them individually, which makes them look premium and gift-ready.
You can also serve them warm with a scoop of vanilla ice cream for a rich dessert experience.
FAQs (Frequently Asked Questions)
Can I make this recipe without eggs?
Yes, I can replace eggs with yogurt or mashed banana for an eggless version.
Can I use other nuts?
Yes, almonds, cashews, or pecans work well in this recipe.
How do I know when it is fully baked?
I insert a toothpick in the center, and if it comes out clean, it is ready.
Can I freeze this dessert?
Yes, I store it in an airtight container and freeze it for up to 1 month.
Why is my dessert too dry?
This usually happens due to overbaking. I always check it early to avoid this issue.
