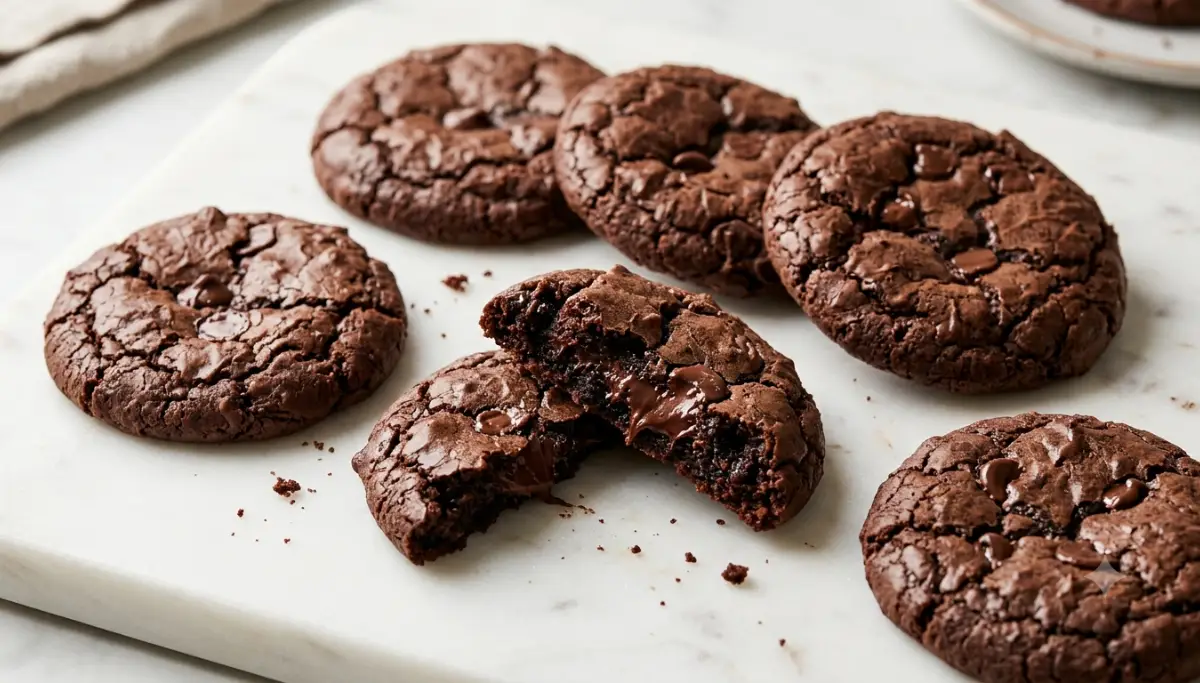
TheChefOutWest Brownie Cookie Recipe brings together two desserts I never get tired of: a rich, fudgy brownie and a soft, chewy cookie. Instead of choosing between the two, this recipe creates a chocolate cookie with the deep flavor and almost brownie-like center that makes every bite feel extra indulgent.
When I make these cookies, I focus on keeping the middle soft while allowing the edges to develop a slightly crisp texture. The key is not to overbake them. Once the centers still look slightly soft, I take them out and let the cookies finish setting on the baking sheet.
Hi, my name is Om Shinde. I am a chef, and I enjoy creating simple recipes that can be made comfortably in a home kitchen. I have always liked experimenting with familiar ingredients and finding small techniques that make a big difference. My family and relatives often taste the recipes I prepare, and their feedback encourages me to keep trying new ideas. I also enjoy sharing food and recipe ideas on social media.
For this version, I wanted to keep the recipe practical, chocolate-forward, and easy to follow. You do not need professional baking equipment, and most of the ingredients are everyday pantry staples.
Recipe Overview
| Detail | Information |
|---|---|
| Prep Time | 15 minutes |
| Chill Time | 30 minutes |
| Cook Time | 10–12 minutes |
| Total Time | About 55 minutes |
| Cuisine | American-inspired |
| Course | Dessert |
| Servings | 12 cookies |
| Estimated Cost | $6–$9 |
| Difficulty | Easy |
| Best Served | Warm or at room temperature |
These cookies are ideal when I want a homemade chocolate dessert without making an entire tray of brownies. The dough can also be prepared ahead of time, making this recipe useful for weekend baking, family gatherings, or casual dessert cravings.
Why These Cookies Taste More Like Brownies
The texture is what makes this style of cookie special. A regular chocolate cookie may be crisp around the edges and chewy throughout, but a brownie cookie aims for something richer and softer in the center.
I use a combination of cocoa powder and melted chocolate to create a deeper chocolate flavor. Brown sugar also helps provide moisture and a chewy texture, while a short chilling period keeps the cookies from spreading too much in the oven.
I have found that the most important step is knowing when to remove them from the oven. They should look set around the edges while the centers still appear slightly soft. They will continue cooking from the residual heat after they come out.
Everything I Use for the Dough
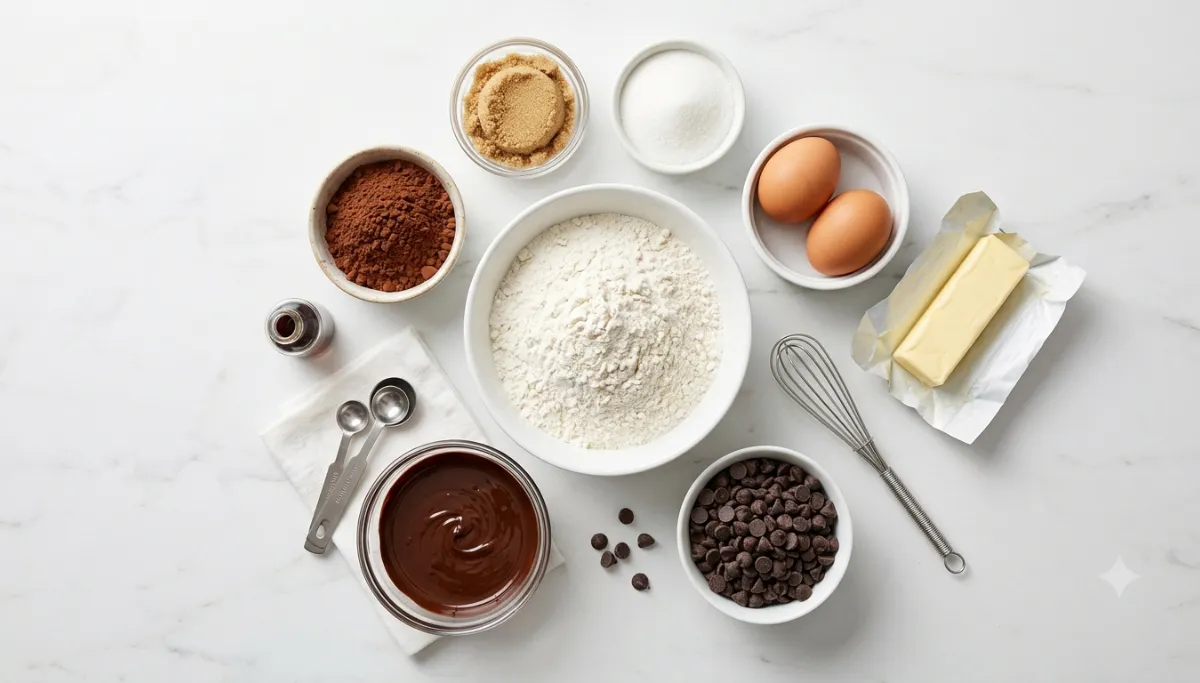
| Ingredient | Quantity | Notes |
|---|---|---|
| All-purpose flour | 1 cup | Spoon and level |
| Unsweetened cocoa powder | 1/2 cup | Use good-quality cocoa |
| Baking powder | 1 teaspoon | Helps with texture |
| Salt | 1/2 teaspoon | Balances sweetness |
| Unsalted butter | 1/2 cup | Melted and slightly cooled |
| Granulated sugar | 1/2 cup | Adds sweetness |
| Brown sugar | 3/4 cup | Helps create chewiness |
| Eggs | 2 large | Room temperature |
| Vanilla extract | 2 teaspoons | Adds flavor |
| Semi-sweet chocolate | 4 oz | Melted |
| Chocolate chips | 1/2 cup | Optional but recommended |
I prefer using a mixture of granulated and brown sugar because it gives the cookies a better balance of crisp edges and soft centers. The melted chocolate is also important because cocoa powder alone can give a dry or flat chocolate flavor if the rest of the recipe is not balanced carefully.
The Simple Equipment I Keep Ready
| Equipment | Purpose |
|---|---|
| Mixing bowls | Combining ingredients |
| Whisk | Mixing dry ingredients |
| Hand mixer | Beating eggs and sugar |
| Rubber spatula | Folding the dough |
| Measuring cups | Measuring ingredients |
| Measuring spoons | Measuring smaller quantities |
| Baking sheet | Baking cookies |
| Parchment paper | Preventing sticking |
| Cookie scoop | Creating evenly sized cookies |
| Wire rack | Cooling the cookies |
A hand mixer is convenient, but you can also make these cookies by hand with a sturdy whisk and spatula. The cookie scoop is not essential either, although it helps me make cookies that bake at a similar rate.
Read Also: Lemon Drizzle Cake Recipe: Soft, Zesty and Easy to Make
My Method for Deep Chocolate Flavor
Step 1: Prepare the Baking Sheet
I start by lining a baking sheet with parchment paper.
I also preheat the oven to 350°F (175°C). Having the oven fully heated before the cookies go inside helps them bake more evenly.
Step 2: Combine the Dry Ingredients
In a medium bowl, I whisk together the flour, cocoa powder, baking powder, and salt.
I like doing this separately because it distributes the baking powder and salt throughout the flour before they are added to the wet ingredients.
I set the bowl aside while I prepare the chocolate mixture.
Step 3: Melt the Chocolate and Butter
I gently melt the butter and semi-sweet chocolate together.
I usually do this in short microwave intervals, stirring between each interval, or use a heatproof bowl over gently simmering water.
Once melted, I let the mixture cool slightly. It should be warm but not extremely hot when it meets the eggs.
Step 4: Beat the Eggs and Sugars
In a larger mixing bowl, I combine the eggs, granulated sugar, and brown sugar.
I beat them until the mixture becomes slightly lighter and smooth.
This step helps create the characteristic texture of a brownie-style cookie.
Step 5: Add Vanilla and Chocolate
I stir the vanilla extract into the egg and sugar mixture.
Then I slowly add the melted chocolate and butter mixture.
I mix until everything looks smooth and evenly combined.
At this stage, the mixture should smell intensely chocolatey.
Step 6: Add the Dry Ingredients
I gradually add the dry ingredients to the chocolate mixture.
I use a rubber spatula and mix gently until no large streaks of flour remain.
I avoid overmixing because too much mixing can make the finished cookies tougher than I want.
Step 7: Add Chocolate Chips
If I am using chocolate chips, I fold them into the dough at this point.
I prefer semi-sweet chocolate chips because they add little pockets of melted chocolate without making the entire cookie overwhelmingly sweet.
Step 8: Chill the Dough
This is one step I do not like skipping.
I cover the bowl and refrigerate the dough for about 30 minutes.
Chilling makes the dough easier to scoop and helps reduce excessive spreading during baking.
Step 9: Scoop the Cookies
I use a cookie scoop or tablespoon to portion the dough.
I place each portion on the prepared baking sheet, leaving enough space between the cookies for them to spread.
For evenly baked cookies, I try to keep each portion approximately the same size.
Step 10: Bake Until Just Set
I bake the cookies at 350°F for approximately 10–12 minutes.
The edges should look set, while the centers should still appear slightly soft.
I do not wait until the centers look completely firm because that usually means the cookies have already gone too far.
Step 11: Let Them Rest
When the cookies come out of the oven, I leave them on the baking sheet for about 5 minutes.
They continue to cook gently from the residual heat and become easier to handle.
After that, I transfer them to a wire rack to finish cooling.
The Little Details That Change the Result
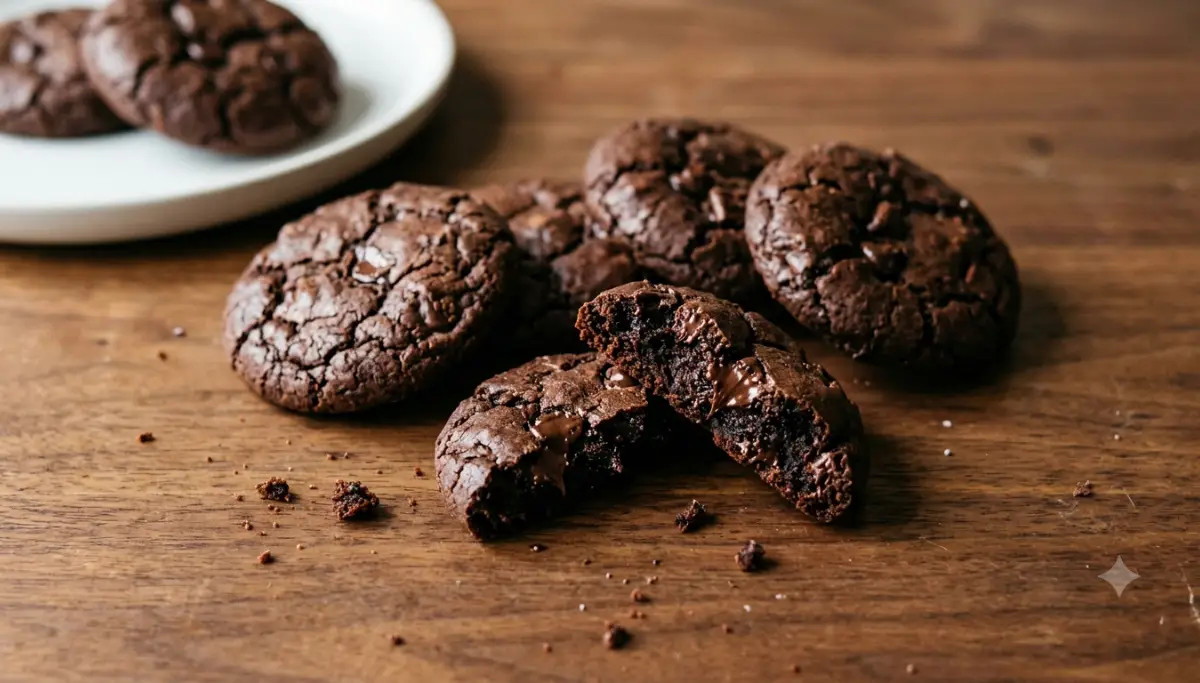
The biggest mistake I try to avoid with brownie cookies is overbaking. These cookies can look slightly underdone when they first come out of the oven, but that is exactly what I want. As they cool, the centers become thicker and chewier.
Another useful tip is to measure flour carefully. Too much flour can make chocolate cookies dry and cakey. I prefer spooning the flour into the measuring cup and leveling it rather than packing it down. Using good-quality cocoa powder and chocolate also makes a noticeable difference because chocolate is the dominant flavor in this recipe.
Easy Variations I Like
Add Chopped Chocolate
Instead of chocolate chips, you can fold chopped semi-sweet or dark chocolate into the dough. The uneven pieces create larger melted chocolate pockets throughout the cookies.
Add Nuts
Chopped walnuts or pecans can provide a pleasant crunch. I usually add around 1/2 cup of chopped nuts and fold them in at the same time as the chocolate chips.
Make Them Extra Chocolatey
For an even deeper chocolate flavor, use dark chocolate chips and a good-quality unsweetened cocoa powder.
You can also add a small pinch of espresso powder. It does not necessarily make the cookies taste like coffee; instead, it can make the chocolate flavor taste deeper.
Finish With Flaky Salt
A tiny sprinkle of flaky sea salt immediately after baking is one of my favorite finishing touches. The salt contrasts with the sweetness and makes the chocolate taste more pronounced.
How I Store These Cookies
Once the cookies have completely cooled, I place them in an airtight container. At room temperature, they are best enjoyed within a few days. If I want to keep them longer, I can freeze the baked cookies in a freezer-safe container.
I recommend placing parchment paper between layers if you are stacking them. When I want to enjoy frozen cookies, I let them thaw at room temperature. A few seconds in the microwave can also bring back some of their soft texture.
My Favorite Ways to Serve Them
These cookies are delicious on their own, but I especially like serving them slightly warm. A scoop of vanilla ice cream on top turns them into a simple chocolate dessert that feels much more elaborate than it actually is.
They also pair well with a glass of cold milk, coffee, hot chocolate, or a simple cup of tea. For parties, I like arranging them on a simple serving plate and adding a light dusting of powdered sugar immediately before serving.
Approximate Nutrition
The following values are estimates for one cookie and can vary depending on the exact ingredients and cookie size.
Nutrition Table
| Nutrient | Approx. Per Cookie |
|---|---|
| Calories | 210–250 kcal |
| Carbohydrates | 28–34 g |
| Protein | 3–4 g |
| Fat | 10–13 g |
| Sugar | 18–23 g |
| Fiber | 2–3 g |
| Sodium | 100–150 mg |
These values are approximate and should not be treated as laboratory-tested nutrition information.
Frequently Asked Questions
What makes a brownie cookie different from a regular chocolate cookie?
A brownie cookie is designed to have a richer chocolate flavor and a softer, fudgier center. The texture is closer to the middle of a brownie while still having the convenient shape of a cookie.
Why do my brownie cookies become hard?
Overbaking is one of the most common reasons. I recommend taking them out when the edges are set but the centers still look slightly soft.
Do I need to chill the dough?
I strongly recommend it. Chilling helps control spreading and makes the dough easier to portion.
Can I use dark chocolate instead of semi-sweet chocolate?
Yes. Dark chocolate works well if you prefer a less-sweet and more intense chocolate flavor.
Can I add walnuts?
Absolutely. About 1/2 cup of chopped walnuts or pecans can be folded into the dough for additional texture.
Can I make the dough ahead of time?
Yes. The dough can be prepared ahead and refrigerated before baking. Keep it covered so it does not absorb odors from the refrigerator.
Can I freeze these cookies?
Yes. Fully baked and cooled cookies can be frozen in an airtight freezer-safe container.
How do I make them extra fudgy?
Avoid overbaking, use melted chocolate in addition to cocoa powder, and allow the cookies to cool on the baking sheet for several minutes before transferring them.
Why did my cookies spread too much?
The dough may have been too warm, the butter may have been too hot, or the dough may not have been chilled sufficiently. Chilling the dough before baking usually helps.
Can I make smaller cookies?
Yes. Smaller portions will bake faster, so I recommend checking them earlier than the suggested baking time.
Conclusion: TheChefOutWest Brownie Cookie Recipe is the kind of dessert I like making when I want something deeply chocolatey without spending hours in the kitchen. The combination of cocoa, melted chocolate, brown sugar, and a soft center gives these cookies a satisfying brownie-like character while keeping the familiar shape and convenience of a cookie.
For me, the most important part is the baking time. Taking the cookies out while the centers are still slightly soft is what helps create that fudgy texture after they cool. A short chill before baking also makes the dough much easier to work with and helps the cookies hold their shape.
Whether you serve them with cold milk, a cup of coffee, or a scoop of vanilla ice cream, these cookies make an easy homemade dessert that feels special without requiring complicated techniques.
TheChefOutWest Brownie Cookie Recipe: Fudgy, Rich and Easy
Rich chocolate brownie cookies with fudgy centers, slightly crisp edges, and deep chocolate flavor. This easy homemade dessert is perfect for chocolate lovers.
Type: Cookie
Cuisine: American
Keywords: TheChefOutWest brownie cookie recipe, brownie cookie recipe, fudgy brownie cookies, chocolate brownie cookies, chewy chocolate cookies, homemade brownie cookies, easy chocolate cookie recipe
Recipe Yield: 12 cookies
Calories: 230
Preparation Time: PT15M
Cooking Time: PT12M
Total Time: PT27M
Recipe Ingredients:
- 1 cup all-purpose flour
- 1/2 teaspoon salt
- 1 teaspoon baking powder
- 1/2 cup unsweetened cocoa powder
- 1/2 cup unsalted butter
- 1/2 cup granulated sugar
- 3/4 cup brown sugar
- 2 large eggs
- 2 teaspoons vanilla extract
- 4 oz semi-sweet chocolate
- 1/2 cup chocolate chips
Recipe Instructions: Preheat the oven to 350°F (175°C) and line a baking sheet with parchment paper. Whisk together flour, cocoa powder, baking powder, and salt. Melt the butter and semi-sweet chocolate together and allow the mixture to cool slightly. Beat the eggs, granulated sugar, and brown sugar until smooth. Add vanilla extract and the melted chocolate mixture. Gradually add the dry ingredients and mix gently until combined. Fold in chocolate chips if using. Cover and refrigerate the dough for about 30 minutes. Scoop the chilled dough onto the prepared baking sheet. Bake for 10–12 minutes, until the edges are set and the centers remain slightly soft. Let the cookies rest on the baking sheet for about 5 minutes, then transfer them to a wire rack to cool.
1 thought on “TheChefOutWest Brownie Cookie Recipe: Fudgy, Rich and Easy”